Results 1 to 6 of 6

Thread: From Wilbur to CAD

  1. #1

    Tutorial From Wilbur to CAD

    Click image for larger version. 

Name:	top pic.jpg 
Views:	66 
Size:	213.0 KB 
ID:	89087

    I posted a picture much like this one on my Twitter account and someone asked how I did it. So here we go.

    A little background:

    I'm using FlashPrint because it came with my 3D printer and Rhinoceros 5.0 because I have it and it's the only 3D modeling/CAD software I've been able to wrap my head around. I downloaded and tried the same procedure with Cura and Blender since they're both freeware and it works. I'm not entirely comfortable with Blender so I wasn't able to get a render that I was personally happy with, but I'm confident it can be done.

    On to the step by step stuff:

    Click image for larger version. 

Name:	1.jpg 
Views:	41 
Size:	159.4 KB 
ID:	89088

    First, you want to create something in Wilbur. I made this little island and I'm rather fond of it. Click the Save icon and your typical pop up appears and is preset to PNG surface. Huzzah, name the file and hit the Save button. We are now done with Wilbur for this project.

    Click image for larger version. 

Name:	2.jpg 
Views:	41 
Size:	174.0 KB 
ID:	89089

    This is a slicer software for turning models into a set of instructions a 3D printer can understand. It also has a helpful feature for saving things as either an .STL or .OBJ which 3D Modeling and CAD software can understand. This is what we're using today. Click the load button (or in other software open a file) and select your PNG surface that you saved from Wilbur.

    Click image for larger version. 

Name:	3.jpg 
Views:	25 
Size:	171.5 KB 
ID:	89090

    This is where the magic happens. When you select the PNG surface image, this pop up appears and asks you to decide how big the object is going to be (Width and Depth) and how tall it's going to be (maximum height).

    There's two modes to choose from, Lighter is Higher and Darker is Higher. Lighter is higher will produce an object where mountains are mountains. Darker is higher will invert the object so that your left with sort of a cake pan of your mountains.

    Click image for larger version. 

Name:	4.jpg 
Views:	55 
Size:	140.6 KB 
ID:	89091

    Hit OK and this is what you get. Note that I shrunk the size down to 70x70 mm later because Rhino was freezing on me at later steps.

  2. #2

    Default

    And Part two, because I can totally not screw up my first post... yup.

    Click image for larger version. 

Name:	5.jpg 
Views:	18 
Size:	158.2 KB 
ID:	89092

    Once you have your object, you can go up to File and select Save As. You want to pick .STL, .OBJ from the dropdown menu and name your file. We're now done with the slicer software. This is also the point where you can hit print and create the instructions for the 3D printer, but that's another topic.

    Click image for larger version. 

Name:	6.jpg 
Views:	24 
Size:	313.7 KB 
ID:	89093

    And now we open our 3D modeling software and import the .STL file we just created.

    Click image for larger version. 

Name:	7.jpg 
Views:	28 
Size:	371.3 KB 
ID:	89094

    This is what shows up after your computer stops thinking for a bit. Currently shown in wireframe mode.

    Click image for larger version. 

Name:	8.jpg 
Views:	33 
Size:	236.9 KB 
ID:	89095

    Now this is specific to Rhino and how I get the nice old time parchment look to my pics. I switch to perspective view, click on the little triangle next to the heading, and select Artistic.

    Click image for larger version. 

Name:	9.jpg 
Views:	56 
Size:	395.4 KB 
ID:	89096

    And after some waiting for the computer to hopefully not freeze up, the results. Take a screen capture, paste into MS Paint, and crop to taste.

    I hope this has been helpful and inspires people!

  3. #3
    Guild Expert johnvanvliet's Avatar
    Join Date
    Jul 2012
    Location
    N 42.39 W 83.44
    Posts
    1,091
    Blog Entries
    4

    Default

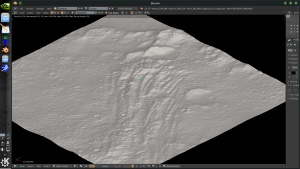
    if you want to use blender i did these using that
    the basics are rather simple for just a heightmap


    import image as planes
    subdivide to about the res of the heightmap
    add a displacement modifier

    - something i was working on this afternoon


    now this is using the node editor and that can be a bit complex
    Last edited by johnvanvliet; 11-02-2016 at 10:51 PM.
    --- 90 seconds to Midnight ---
    --------

    --- Penguin power!!! ---


  4. #4
    Administrator ChickPea's Avatar
    Join Date
    Jan 2015
    Location
    Sunny Scotland
    Posts
    6,884

    Default

    Fantastic work on this!
    "We are the music makers, and we are the dreamers of dreams"

  5. #5

    Default

    Thank you!

    And I love that crater-scape Johnvanvliet!

  6. #6
    Guild Expert johnvanvliet's Avatar
    Join Date
    Jul 2012
    Location
    N 42.39 W 83.44
    Posts
    1,091
    Blog Entries
    4

    Default

    real data from the dawn mission to Ceres
    -- mostly

    there is a bit of artistic and unscientific license taken

    but i use blender for this
    --- 90 seconds to Midnight ---
    --------

    --- Penguin power!!! ---


Posting Permissions

  • You may not post new threads
  • You may not post replies
  • You may not post attachments
  • You may not edit your posts
  •