

 Reply With Quote
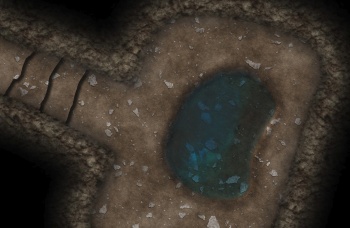
Here's an example of my poor efforts with edging...
I haven't exactly spent a lot of time on this, and I prefer to use very basic techniques I can automate.
Any advice greatly appreciated.


Can anybody offer any advice on techniques or best practices for joining together terrain edges, where one type of terrain meets another? I've seen wonderful results in maps, but have little idea how those finish products were created.
I find that similar colours and brightest are easier to work with, but for instance making water realistically meet the edge of a natural pool seems quite difficult.
Any tips?
Here's an example of my poor efforts with edging...
I haven't exactly spent a lot of time on this, and I prefer to use very basic techniques I can automate.
Any advice greatly appreciated.
both Gimp and Photoshop have a tool called "heal"
it is a type of cloning tool that blends
( the real description is a lot more complex and based on many PHD and siggraph papers )
you can smooth over a hard line with it
the gimp version is partly based on
" Image Reconstruction Invariant to Relighting."
http://www.tgeorgiev.net/Invariant.pdf
a quick "heal" on the hard lines and arrows ( about 5 min. )
Last edited by johnvanvliet; 02-16-2015 at 05:22 PM.
--- 90 seconds to Midnight ---
--------
--- Penguin power!!! ---
Yes, I've used the PS healing brush tool, but mostly not with much success, however I've never considered using it here. I'll try it.Originally Posted by johnvanvliet

I always found the stamp tool more effective, as heal tended to just leave a bit of a smudge.
The trouble with edges on maps... they are discrete and masked/clipped, meaning I'm not sure how heal will understand what to do with the layers beneath. I'll check it out though and report back.

When I blend my edges together, I will typically overlap the media a tiny bit (So make the rock go a little over the stairs. Then use a low opacity eraser, and use it to "blend" the layers into each other. It has a mixed success rate and isn't for everything.
Mostly i used a 12 px 50% hard brush
set the opacity of the brush to 20%
( see the documentation on HOW the "heal" tool works, the brush opacity has a BIG!!! impact )
--- 90 seconds to Midnight ---
--------
--- Penguin power!!! ---
Understood, but because everything is layered I can feather for the same effect.
So... I'm off to try the feathering
but you can feather the edge originally in the selectionUnderstood, but because everything is layered I can feather for the same effect.
you can even go back on a layer and feather it ( however it is more complicated later )
--- 90 seconds to Midnight ---
--------
--- Penguin power!!! ---
Thanks for the example John.
Have to say I'm not overly keen on the grayish tinge, and I like a sort of hard edge, but one that looks more realistic. So damn hard. I think I'll grab some screen shots of real water and see if I can recreate the effect.
I reckon a combination of healing, feathering and maybe then re-adding a finer edge, might work though.
The best stuff I've seen blends in shadow, so as to hide the result so to speak, but once you get the area lit, the effects look worse. Unless of course the subject IS a hard edge, e.g. a wall meeting the ground.
With water, maybe a damp effect might also help to mask the edging.
I'm a fussy git, but playing around is fun
Yeah, opacity is king, and a soft edged brush can be used, but like you I prefer opacity. I think I need a graphics tablet with pressure sensitivity
 Posting Permissions