Results 1 to 9 of 9

Thread: Tutorial Issues

  1. #1
    Guild Novice
    Join Date
    Aug 2015
    Location
    San Diego, California
    Posts
    10

    Help Tutorial Issues

    Last night I started using the "Hand-Drawn Map Tutorial (for the Artistically Challenged) by Gidde @ the Cartographer's Guild" tutorial and ran into a problem at the beginning of the section called "Roughing in Terrain". It says "Grab the paintbrush tool ( ) and change to the fuzzy circle 19 brush, and then scale it all the way up to 10 so we have a nice, big round brush. Use a color that says “mountain” to you (it won't be in our final, so it can be fuschia if it makes you happy, but don't use black, white or gray)."

    So to this point the tutorial helps idiots like me, but Gimp does not have a "fuzzy circle 19 brush" it is not listen anywhere in the tools. I just picked one and adjusted the area of impact to be small. The part that killed me was that it doesn't tell you how to select a color. I tried using common sense but no matter what I clicked on to give my brush color it just brushed in black. The tutorial says "but don't use black, white or gray". So I got frustrated and gave up... without saving I might add. I also have a black and grey checkerboard over my map.

    To this point I was having a blast. I will literally need a step by step description and up to this point it shows you insert pictures of what you should be seeing. Help me out with the color issue I'm having and If I run into more issues I will post on this thread.

    Thanks in advance, this is an awesome community.

  2. #2
    Guild Expert johnvanvliet's Avatar
    Join Date
    Jul 2012
    Location
    N 42.39 W 83.44
    Posts
    1,091
    Blog Entries
    4

    Default

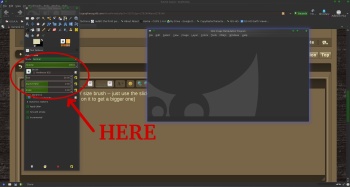
    in gimp you can have ANY size brush -- just use the slider
    click on the paint brush then adjust the size
    -- see below image for Gimp 2.8.14 ( click on it to get a bigger one)


    as to selecting a color
    see the black and white squares above the red oval -- click on the white one

    you might want to READ and the user manual
    http://www.gimp.org/docs/


    Also keep in mind , that tutorial is now 5 years old and The gimp has changed A LOT in the last 5 years
    the underlying code has been almost 100% rewritten
    Some of the OLD gimp 2.4 was tossed into the trash can and the 2.6 came out fallowed by tossing the rest of the code in the trash and released the 2.8 gimp

    this is on it way to the 3.0 that will have ALL new code from the version used 5 years ago

    the current gimp2.8 is NOT the same gimp 2.4 and 2.6 from 2010
    Last edited by johnvanvliet; 09-04-2015 at 11:25 PM.
    --- 90 seconds to Midnight ---
    --------

    --- Penguin power!!! ---


  3. #3
    Guild Novice
    Join Date
    Aug 2015
    Location
    San Diego, California
    Posts
    10

    Default

    I had no idea! I know I'm semi computer illiterate but I thought I was going insane. So I guess I'm kind of screwed unless I try to read and decipher the user manual. Is Photoshop any easier?

  4. #4
    Guild Expert johnvanvliet's Avatar
    Join Date
    Jul 2012
    Location
    N 42.39 W 83.44
    Posts
    1,091
    Blog Entries
    4

    Default

    I know I'm semi computer illiterate
    i forget i have used these things since BEFORE " MS windows" was a twinkle in bills eyes
    -- graduated High School 1.5 years BEFORE windows 1.0 came out on REAL FLOPPIES -- 5 in disks

    -- BSD and Amiga and BIG BLUE IBM


    the gimp user manual is not hard to use
    http://docs.gimp.org/2.8/en/gimp-first-steps.html
    there are also tons of YouTube videos

    Photoshop costs like $3,500
    but there is a reduced ( dose less ,non commercial ) version for like $79.99
    "Photoshop Elements"

    or the cloud service for $19.99 PER MONTH
    Last edited by johnvanvliet; 09-09-2015 at 01:44 AM.
    --- 90 seconds to Midnight ---
    --------

    --- Penguin power!!! ---


  5. #5

    Default

    $3500 is an exaggeration. Actually, you can't even buy a perpetual license for it any more, but when you could it was about $600. Adobe currently offers Photoshop for $10 / month. They keep implying that it's a limited-time offer, but there hasn't been any signs that it's going away.

    Photoshop Elements has a different interface and fewer tools, and most of the tutorials written for the full Photoshop are not transferable to Elements.

    I wouldn't say that Photoshop is any "easier," but its interface changes more slowly over the years than the Gimp's.

    I'd say you should stick with Gimp but try to find some tutorials that were published more recently than the one you've been following. You may want to find some introductory tutorials that are more general than cartography just to get accustomed to the software before you get into something that is so specific and complex. Gimp is tremendously flexible and powerful, but that comes with a lot of complexity that will take some time to learn.

    I'm a Photoshop user, myself, so I'm afraid I cannot offer any specific guidance for Gimp.
    Bryan Ray, visual effects artist
    http://www.bryanray.name

  6. #6
    Banned User
    Join Date
    Jul 2014
    Location
    Traverse City, Michigan, USA
    Posts
    2,547

    Default

    I personally think Photoshop is the way to go. Nowadays, it costs $20/month for a full range of Adobe programs, and will undoubtedly be supported for many many years. It has massive capability but easy enough to learn the basics and create lots of maps before you even notice the need for anything advanced.

    All the GIMP tutorials transfer directly to Photoshop, with just a little bit of research to find the equivalent tool in PS, and there are lots of tutorials around here for PS.

    Since you have to go through a learning curve anyway, my vote would be that if $20/month is not a budget-breaker, go for Phototshop.

  7. #7
    Guild Novice
    Join Date
    Sep 2015
    Location
    Indiana
    Posts
    9

    Default

    HELP!!! I have photoshop cc 2014 and when im following the atlas builder it looks nothing like any of the tutorials for it when it comes to lighting effects and that's where im having trouble getting past or figuring it out in general can ANYONE help me???

  8. #8

    Default

    Wow, that is different.

    Okay, I'll walk you through what's going on there. Generally speaking, for cartography you'll want to use the Infinite light type. In the drop-down box at the top of the Properties panel where it says "spot", change that to "infinite." This creates a sun-like light source that casts parallel rays across your image.

    Skip down to the bottom where it says "Texture:" and change the selection in that box to your heightfield or bump map channel (probably Alpha 1 if you've been following one of the tutorials I'm familiar with. See below if you're not clear on the channel thing. I'll describe it for those following along at home.) Then grab the Height slider below that and pull it to the right a ways. A value of 20 - 30 is usually good, but it will vary depending on the light angle and the amount of relief you want to see.

    Now you can start playing with that weird handle in the image. This is where it's the most different from previous versions of Photoshop, and it's a huge improvement for interaction with the thing. The small ball is a handle that controls the angle that the light is coming in. Moving it further away from the center ball causes the light to move closer to the "horizon," giving stronger and more dramatic shadows. And the angle relative to the center controls which direction the light is coming from. You also get an icon at the edge of the window showing that actual location and orientation of the light (it always points at the center of the image). There is also a translucent hemisphere that helps to visualize the position of the light. The rays are always perpendicular to the flat surface of that hemisphere.

    The only weirdness there in my opinion is the intensity control, which is that circle inside the center ball. To adjust it, you drag the line in a circle, which is a bit unintuitive. Be aware that dragging it to the left can create a light with negative intensity. Under most circumstances, that will just make everything black.

    Okay, so back to the Properties panel:
    Color is currently white, and generally speaking you should leave it there unless you have a specific reason to change it. Usually I'd perform a color change of that kind with an adjustment layer in the main interface rather than doing it here.

    Hotspot should be grayed-out for an infinite light. Colorize changes the color of the ambient light; again, I'd be more likely to make changes elsewhere than mess with it here. Exposure is very sensitive, and it's usually easier to adjust the brightness of the image using the light intensity control instead of doing it here.

    The Gloss and Metallic controls are occasionally useful. Increasing Gloss makes things shinier. Increasing it makes your highlights a little brighter and less saturated. However, it interacts with Metallic, which can undo the saturation change. Conductive metals give reflections their own color, while everything else reflects white. In a map, highlights are not usually actually reflections, so although your mountains aren't metallic, it's sometimes useful to turn Metallic all the way up in order to preserve the colors you've chosen. Gloss then becomes just another brightness control for the highlights.

    Ambience is a simple add control. I recommend usually leaving it at 0. If you pull it to the left, you'll get negative values, which will "crush" the details out of your shadows. If you pull it to the right, the highlights will "clip," again destroying detail. You can use Ambience in combination with Exposure, though, to create a less contrasty lighting effect. Pull Exposure down and push Ambience up by about the same amount to see what I mean.

    Finally, Height controls how steep your hills appear to be.

    To commit the changes, there is an "Ok" button in the toolbar above the viewport.

    That covers the controls, and hopefully clears up any confusion. Now for that detail of the Texture channel.

    Lighting Effects requires that your heightfield / bump map be a single channel in your image rather than a layer. The easiest way to make this happen is to view your heightmap by itself, Select All (ctrl+a), and Copy (ctrl+c). Then switch over to the Channels palette (by default it's in a tab next to your Layers) and paste (ctrl+v). A new channel called Alpha 1 will appear in the list. That's the source for Lighting Effects. You can rename it if you like. If you've clicked on it and can only see the alpha in your viewport instead of your normal layers, just click the RGB channel at the top of the list.

    Sorry for not providing any screenshots. I'm writing this at work, so I can't take too much time to make a proper formal tutorial out of it.
    Bryan Ray, visual effects artist
    http://www.bryanray.name

  9. #9
    Guild Novice
    Join Date
    Sep 2015
    Location
    Indiana
    Posts
    9

    Default

    its ok I thank you for taking out the time to at least tell me about it I will try it out later and let u kniw what happenes... other then that I really only have one other problem... and that's where I'm suppose to select all the black and change it to 1 but it doesn't let me and say that no pixels were selected unless I set it to 200

Posting Permissions

  • You may not post new threads
  • You may not post replies
  • You may not post attachments
  • You may not edit your posts
  •