Page 2 of 2 FirstFirst 12
Results 11 to 16 of 16

Thread: Modeling Spaceships using Blender 3D

  1. #11
    Guild Adept bryguy's Avatar
    Join Date
    Jul 2008
    Location
    In my own little world =D
    Posts
    289

    Tutorial

    aha! I have discovered de secret of de spinner!!


    Using the Spinner in Blender:


    The spin tool, if used correctly, is actually very simple. Hopefully this will allow you to use it effectively.


    1) Open Blender, and delete the square, or open your image if you want.

    2) This is the MOST IMPORTANT PART. If you get this wrong, or any part about it, it will mess up your image. First, something you need to know. Have you ever noticed that little target like thing? The one that if you just click with your LMB on the 3D screen, it moves to about where you click? THAT is the all important secret to the spinner. So before you create your object that your going to spin, be sure to do this.


    1} Use the 2 and 8 buttons to change your view so that your look straight down. Now click somewhere, about the center of where your object is going to spin. Its okay if its slightly off. I like to line it up with the red and green lines, or about.


    2} Now change your view to a side view. If you dont have your object that your going to spin, then create one. The object your going to spin has to be COMPLETELY AND TOTALLY FLAT. It works best if you make your object out of a bunch of planes. For now, if you dont have an object, rotate your view to the side (so that the grid just looks like a flat line) and then hit the spacebar and choose Add--> Mesh--> Plane.


    This is how your thing should be looking, with the target thingy about in the center of your plane, no matter what view your in.

    3} Now use your arrows to get it complete lined up with the little target thing, rotating your view to the top if needed.


    3) Now once its all lined up, with the side thats in the center also lined up with the other 2 lines, with the plane still selected, change your mode Edit Mode


    4) In edit mode, hit Cntrl+Tab and choose Vertices. Now hit the AKey to deselect all vertices, then hit it again to select all of them.


    5) Now to use the spin tool. Take your view back to an overhead view if your not, and then under the spin tool, set Degr to 360, and then click the [b]Spin button[b/].


    Walla! You should now have it spun all the way around! If it ends up with gaps between segments, then your object was not a plane to begin with, and it wont work right. If you want (I actually have no clue what this does) hit the Akey to deselct all, then hit it again to select the entire thing again, and hit the Rem Double button.


    Here are some pictures of my outcome:

    "When I use a word," Humpty Dumpty said in a rather scornful tone," it means just what I choose it to mean -- neither more nor less."
    "The question is," said Alice, "whether you can make words mean so many things."

    "The question is," said Humpty Dumpty, "which is to be master -- that's all."


    -Lewis Carrol: Through the Looking Glass

  2. #12
    Administrator Redrobes's Avatar
    Join Date
    Dec 2007
    Location
    England
    Posts
    7,196
    Blog Entries
    8

    Post

    Originally I dont know what I was doing as I was doing that which you described and it came out totally garbage.

    Once I had it giving me goblet shapes like you have described I was doing what you are describing but that is wrong. What you are describing is what I would say is the logical and sensible thing to do and is the way light wave does it.

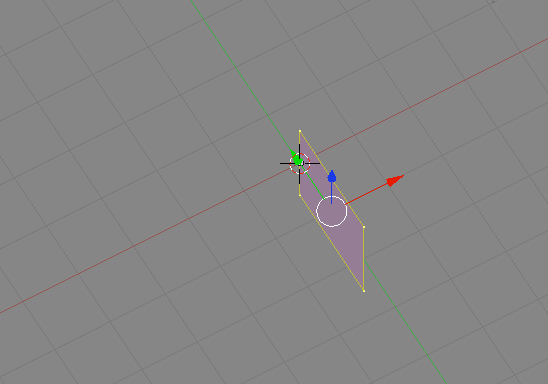
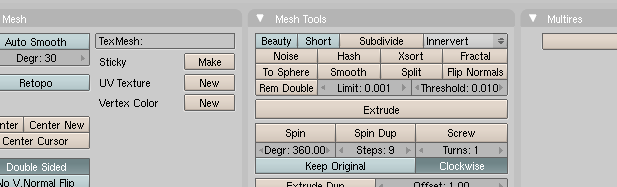
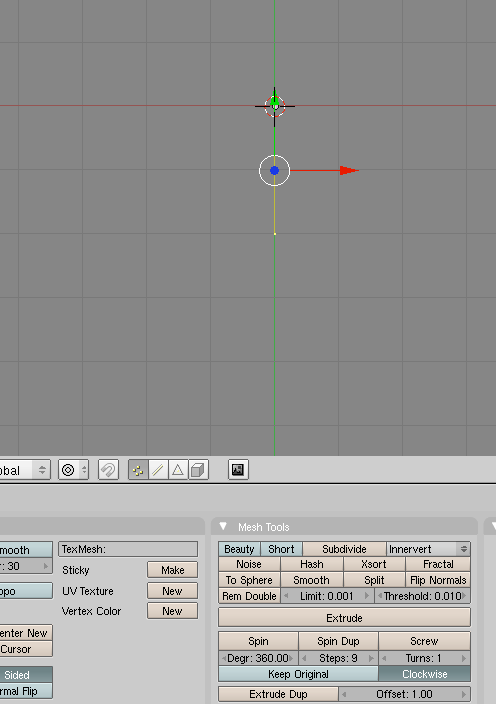
    You see if you now switch on the normals using the Mesh Tools 1 panel in edit mode buttons window and set the normal size to 0.5 or 1 or something sensible you will see that you have some extra ones at the join because there are hidden faces there. These faces point into the middle of your new shape and destroy the outside surface.

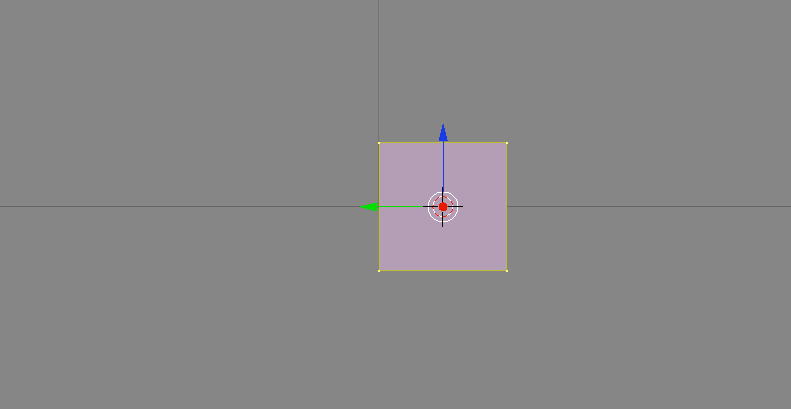
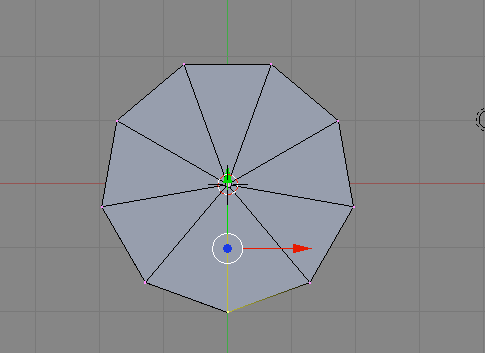
    You see you used a plane which is a 2D solid. The spin tooltip describes it as a rotary extrude which in my mind needs a 2D solid to extrude from to create a 3D solid right ? Well it seems the blender devs disagree. What you need to do is create 4 edges to that plane and not have any faces in it. Then when that spins it creates the 2D outside surface as extrusions from the 1D edges. Then there are no caps to it so you do the remove double and it stitches the final points together and makes it seamless. Then a recalc normals seems to still be required for some bizarre reason and your done. Solid with no dodgy internal end caps.

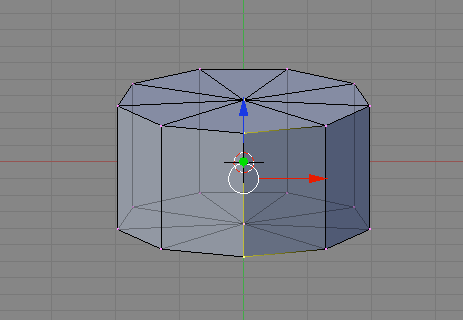
    Had you have spun less than 360 deg then you would need it to be a solid so that the ends were capped.

    It seems to me that everything with blender is a fight to the death. In light wave if you spin less than 360 it keeps the end caps and if you spin 360 degrees then it joins it up and removes them for you. Exactly what you would expect.

    What blender is doing is the literal digital 3D process described. Light wave does the physical manifestation of what your asking for. That's why I am having a hard time with this app. In that light neither of them are showing bugs but I want the physical effect simulator not a math sequence processor.

  3. #13
    Administrator Redrobes's Avatar
    Join Date
    Dec 2007
    Location
    England
    Posts
    7,196
    Blog Entries
    8

    Post

    Ok its even more weird than that it seems. I did exactly as you tried and used a plane and shifted it side by a bit and spun it into a square donut. Flawless.

    Then I do again, take a plane, but this time did like the tut said and deleted 3 of the points and then added my own new ones with ctrl + LMB and made a shape, connected that shape up with faces and then spun that.

    This time it did have the extra bits and if I show you what happened after the remove doubles and a recalc normals then it messes up on the faces around the join. I deselected all and then used 'select non manifold' and its highlighting the edge showing that there are hidden faces in there.

    I am at a loss to know whats going on now. It seems that to be sure, use edges only and it definitely works but if you use a face then it might not get rid of the join part correctly.

  4. #14
    Guild Adept bryguy's Avatar
    Join Date
    Jul 2008
    Location
    In my own little world =D
    Posts
    289

    Post

    now you've managed to get me completely confused
    "When I use a word," Humpty Dumpty said in a rather scornful tone," it means just what I choose it to mean -- neither more nor less."
    "The question is," said Alice, "whether you can make words mean so many things."

    "The question is," said Humpty Dumpty, "which is to be master -- that's all."


    -Lewis Carrol: Through the Looking Glass

  5. #15
    Administrator Redrobes's Avatar
    Join Date
    Dec 2007
    Location
    England
    Posts
    7,196
    Blog Entries
    8

    Post

    Well what blender likes is to have a ring of edges and spin them. Imagine that you have one of those large thin hoops dipped into detergent water then you hold it out and spin in a circle. The edge ring forms a donut as its extruded out like the soap bubble forming out of the back of the hoop. If you could join the start and end together you get the donut as a hollow loop.

    What we have been doing is more like getting a solid rubber pipe and bending it back on itself so that the ends come together to make a donut. At the point the two end touch blender has two circles of virticees. What should happen is that those end faces vanish and the rubber pipe is a single donut again. You had two sets of circular virticees so when you 'remove double' one of them vanishes leaving you with a nice clean continuous surface.

    Whats actually happening is that you can get a hollow donut shape but with the ends still left in so that at the join your surface splits so that in one direction is continues the loop and the other direction it cuts across the join.

    When a surface splits thats called 'non manifold' and its not mathematically good to have that in 3D modeling as you don't know which side is the outside any more. Boolean ops as well as extrudes and more spins will all start to go bad or the app will start bitchin. You need to fix that split which is pretty hard - well tedious at any rate.

    So use a loop of edges not a flat 2D shape to spin with. At least thats what its suggesting is the right thing to do - im still wildly nooby with this app.

    Its good to have some extra heads to bounce ideas off of tho. Its a pity we didn't have several people pile and and try out stuff and we could all work it out as a group. I know Su-Liam and Torq have used it to some extent but I dont know how much in either case.

  6. #16

    Post

    I'm having trouble. When I try to duplicate one wing, it ends up duplicating all objects. Before going into Object Mode, I have the one face selected.

    What am I doing wrong?

Page 2 of 2 FirstFirst 12

Posting Permissions

  • You may not post new threads
  • You may not post replies
  • You may not post attachments
  • You may not edit your posts
  •