Page 7 of 9 FirstFirst ... 3456789 LastLast
Results 61 to 70 of 89

Thread: [Award Winner] Battlemaps in Photoshop

  1. #61
    Guild Artisan madcowchef's Avatar
    Join Date
    Feb 2012
    Location
    Pacific Northwest USA
    Posts
    682

    Default

    Great choice of textures I especially like what you went with for the water. I use blender for smaller map elements, but rarely for terrain at large. Combining it with the much beloved Wilbur is a fun way to model mountains that I've only rarely messed with, as you say the intuitive interface is not a thing for blender.

  2. #62
    Guild Adept Guild Sponsor
    Join Date
    Feb 2014
    Posts
    292

    Default

    Quote Originally Posted by Wulfquee View Post
    still no replay from Wdmartin
    Whoops! Sorry, I didn't see this. December was ... pretty awful.

    Anyway, if you'd like to include the leaf trick in a PDF, go ahead.

  3. #63

    Default

    Quote Originally Posted by madcowchef View Post
    Great choice of textures I especially like what you went with for the water. I use blender for smaller map elements, but rarely for terrain at large. Combining it with the much beloved Wilbur is a fun way to model mountains that I've only rarely messed with, as you say the intuitive interface is not a thing for blender.
    Thanks! I'm pleased with how it turned out. Prior to this, I'd only done two interiors in Dundjinni.

    I have seen someone creating battlemaps regularly in Blender, but it isn't the easiest thing to use.

  4. #64
    Guild Expert johnvanvliet's Avatar
    Join Date
    Jul 2012
    Location
    N 42.39 W 83.44
    Posts
    1,091
    Blog Entries
    4

    Default

    Great tutorial! I've been trying to learn Blender to make battlemaps
    not the best tool
    nor even a "ok" tool for that
    ( yes it can be done , just like MS's Excel spreadsheet CAN be used to DRAW a image using the cells )
    there is an Japanese artist that dose that


    while blender can edit raster data it is not meant for that

    i export uv mapped images and edit those in gimp and reimport them into blender


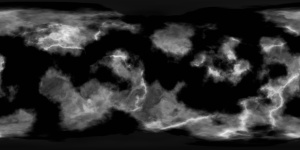
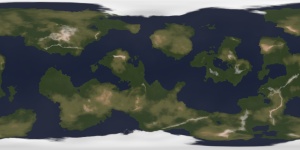
    blender is great for 3d and some 2d'ish like this random generated texture
    -- an exception is the node editor for guided RANDOM things
    Last edited by johnvanvliet; 01-15-2017 at 03:07 PM.
    --- 90 seconds to Midnight ---
    --------

    --- Penguin power!!! ---


  5. #65

    Default Toscana MAIN

    Just thought I'd throw this out here. Just finished making this pretty generic road for any number of encounters. Feedback would be appreciated.

    Click image for larger version. 

Name:	m0bK0rD.jpg 
Views:	126 
Size:	1.89 MB 
ID:	91454

  6. #66
    Guild Expert Facebook Connected Meshon's Avatar
    Join Date
    Nov 2009
    Location
    Edmonton, Alberta, Canada
    Posts
    1,166

    Default

    Quote Originally Posted by Aabra69 View Post
    Just thought I'd throw this out here. Just finished making this pretty generic road for any number of encounters. Feedback would be appreciated.

    Click image for larger version. 

Name:	m0bK0rD.jpg 
Views:	126 
Size:	1.89 MB 
ID:	91454
    Hi Aabra, that's a fine looking map. You should post it in the Battlemap forum, you'll be more likely to get feedback there I think. One thing I like to see on roads is evidence of travel; wheel ruts, horse prints, that sort of thing.

    Cheers,
    Meshon

  7. #67

    Default

    Quote Originally Posted by Meshon View Post
    One thing I like to see on roads is evidence of travel; wheel ruts, horse prints, that sort of thing.

    Cheers,
    Meshon
    I want to do things like that - I posted in the Help forum - but perhaps you can point me to something, as you've mentioned it.

  8. #68

    Default

    Quote Originally Posted by egdcltd View Post
    I want to do things like that - I posted in the Help forum - but perhaps you can point me to something, as you've mentioned it.
    I would also love to do it. I tried adding some straight lines for wheel tracks.... I then reduced the opacity and used a grunge brush to randomly delete parts of it. I applied an emboss filter with a texture.... it looked.... I mean it wasn't terrible I suppose but the map looked better without it. Any suggestions on how you would create it? BTW I made another Swamp map which I have posted in the Battle Maps forum as you recommended. Hopefully I'll get some good feedback.

  9. #69
    Guild Artisan madcowchef's Avatar
    Join Date
    Feb 2012
    Location
    Pacific Northwest USA
    Posts
    682

    Default Wagon Tracks

    Round Up your Wagon (wheels):
    Let make us some wagon tracks ignoring the whole horse wear in the center in favor or the expected wheel ruts, because this is a map and we get to make things representative rather than illustrative sometimes.

    First off we need a wagon wheel brush. Lets open a new file and create a new layer. On it we are going to put two dots:
    Click image for larger version. 

Name:	wagobrushtutFirst.jpg 
Views:	57 
Size:	47.4 KB 
ID:	91568
    Very complex I know.
    -Select it all (ctrl+a)
    -edit => define brush preset
    -Go into your brush tab and turn the spacing way down
    Click image for larger version. 

Name:	WagonbrushTut_0001_Layer 0.jpg 
Views:	37 
Size:	108.7 KB 
ID:	91569
    -Go into shape dynamics in that brush tab and change the angle control to "direction"
    Click image for larger version. 

Name:	WagonbrushTut_0000_Layer 2.jpg 
Views:	31 
Size:	117.0 KB 
ID:	91570
    Save the brush!

    Now create a new layer on your map.
    using the pen tool draw out your wagons path
    Click image for larger version. 

Name:	WagonWheelTut_0004_1.jpg 
Views:	55 
Size:	210.1 KB 
ID:	91571
    go back to you brush tool make sure your wagon rut brush is selected and black is your foreground color and hit enter (this will stroke the path you made with the pen tool with your brush)
    Click image for larger version. 

Name:	WagonWheelTut_0003_2.jpg 
Views:	60 
Size:	212.1 KB 
ID:	91572
    Yay its ugly!
    First lower the fill of the layer to something small (say 14%) you can adjust the over all opacity later if you like also.
    Lets add some emboss to it, you can see the settings I used and imitate them or mess around till you get something you like better:
    Click image for larger version. 

Name:	WagonWheelTut_0002_3.jpg 
Views:	54 
Size:	194.8 KB 
ID:	91573
    next to make it look a little more imperfect we will add some of the "texure" option to our emboss choosing any old dirt looking pattern we have laying around:
    Click image for larger version. 

Name:	WagonWheelTut_0001_4.jpg 
Views:	41 
Size:	182.5 KB 
ID:	91574
    Finally well put that whole layer in a folder (control+G) and put a layer mask on the folder. We then just need to use a blurry edged brush set to low opacity and randomly lighten up some of the path to break up the evenness. there we go one wagon wheel rut.
    Click image for larger version. 

Name:	WagonWheelTut_0000_5.jpg 
Views:	77 
Size:	211.6 KB 
ID:	91575

  10. #70

    Default

    That's great! And you can use the same method for hoof prints too - instead of using a couple of dots for the brush, use a couple of horseshoe shapes slightly offset from each other, and turn the spacing up, not down.
    Click image for larger version. 

Name:	horseshoes.jpg 
Views:	67 
Size:	76.9 KB 
ID:	91578

Page 7 of 9 FirstFirst ... 3456789 LastLast

Posting Permissions

  • You may not post new threads
  • You may not post replies
  • You may not post attachments
  • You may not edit your posts
  •