


Since Ascension asked, I thought I would put up a tutorial of how to make a pretty good looking spaceship in Blender
I dont have time to add to many pictures yet, so Ill go through later and add more.
Before we start, there are some things you will need for this, some of which may just be helpful, but arent really necesarry:
A Computer
Blender 3D (Download it here: http://www.blender.org/download/get-blender/ )
A Keyboard
A 2 Button Mouse (you can probably use a 1 button mouse, but 2 button works best)
Electricity
Your Computer Plugged Into An Outlet
Time
Oh, and here are some keys/key combinations that you may want to know:
A (or AKey) : Select/Deselect all
Cntrl+Tab (in edit mode) : Choose what to select (Edges, Vertices, or Faces)
Cntrl+Z (or Cntrl+ZKey) : Undo
8 (or 8Key, not in the regular number area on your keyboard thats from left to right, 1 to 0, but the one that is usually to the right of the arrow keys) : Rotate View Up
2 (2Key) : Rotate View Down
4 (4Key) : Rotate View Left
6 (6key) : Rotate View Right
Right Mouse Button Click (RMB) : Select Object
Spacebar : Add objects, Edit selected objects, Transform selected objects, and more
Now that you know those, your ready to start
Part 1: Making the shapes
1) Okay first, open Blender. When you open it, you should get a screen like this
Now you need to select the box that they have (it may already be selected, items are selected if they have a pink outline around them) by Right Clicking on it.
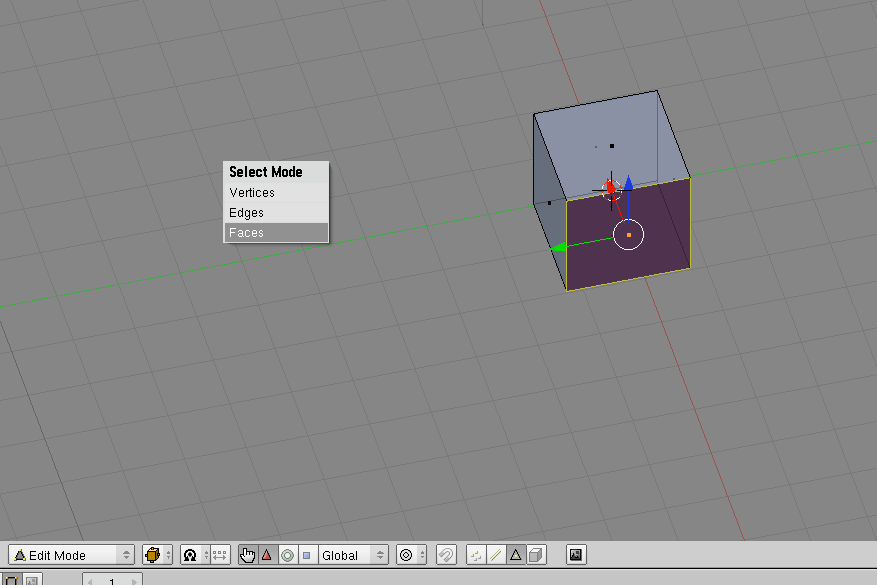
2) Now we're going to shape the box into any shape we want. For now, we are going to shape it into a sort of triangle. If you want to use it as a box, thats fine, but I suggest following this tutorial using it as a sort-of triangle. To be able to modify it, in the lower buttons area (with stuff like Modifiers, Shapes, Multires, Mesh, and Link and Materials) you should see a dropdown menu that is currently on Object Mode. Change that to Edit Mode. Now you will be able to modify different aspects of your box.
3) With your box selected, hit Cntrl+Tab, and choose Faces. This allows you to modify the different faces. Faces are basically the different sides of your object, Edges are the edges of your object (lol 'Thank You Mr. Obvious), and Vertices are points on your object where edges connect.
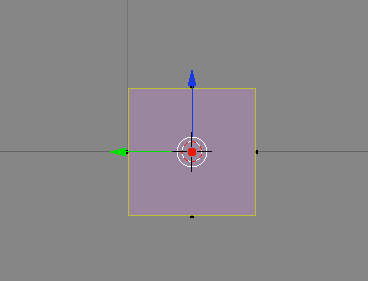
4) Now, on your box, right click on one of the sides to select that side. If you want, first take a look around the box and then choose a side, but dont select the bottom or top face. To rotate around the box, hit the 8, 2, 4 or 6 button on your number pad, the one to the right of the arrow keys usually. Those buttons allow you to rotate around your objects and change your view. After you select the face you want, then rotate so that the face is facing towards you and looks like a square, and so that the grid around it looks like a flat horizontal line.
There should be three arrows converging in the center of your face (or in the center of your box), and either the red or the green one should now be in the center of your face, and the other should be going off to the left or right, with the blue arrow going straight up or straight down. Use the 4 or 6 number pad button to rotate your vew so you can see whichever arrow was in the center of your face, and left click mouse button on it, and hold the left click button, and drag the arrow around. Drag it until you have a rectangle.
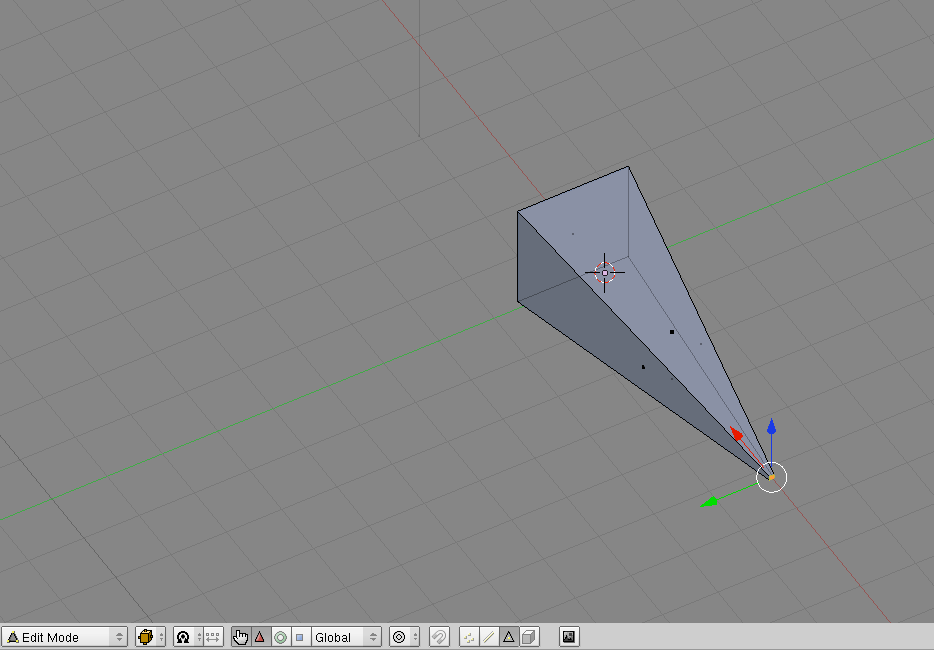
5) Now to resize that face. With that face still selected, hit the S key, and move the mouse around. This should enable you to change the size of the face, and once you click, it should stop resizing and stay at that size. Experiment and get the hang of it, and then resize it so that it is an itsy bitsy teeny tiny box, and your rectangle more like a triangle. Congratz! You have just made your first shape/object
Keep experimenting all you like, and try to make different shapes. Try moving around edges, vertices, or creating different shapes, or duplication your current shape. To add more shapes, with your mouse in the 3D screen, hit the spacebar, and do select Add:, and then choose what you want to add. I like using cubes, cause you can modify those to your hearts content to create any shape (or almost). You could also (after hitting the Spacebar) choose Edit to edit your shape, Transform for things like duplicating and rotating, or any of the other options.
Note: If you have an item selected and then go to edit mode and then add an item, these items will be connected and edited at the same time. I suggest you go back to Object Mode before adding new objects.
If you want your cube smoother, more like a ball, then heres what you do:
1) Change your mode to Object Mode, and select your object
2) Under the screen that has all those different things (Link and Materials, Mesh, etc) go under Modifiers: Add Modifier: Subsurf, and then increase the Levels to make it smoother.
Ill continue with the creation of the spaceship tomorrow, or sometime after I add pictures to thisFor now, keep experimenting, as I find that that is the best way to learn


 Reply With Quote