Results 1 to 10 of 16

Thread: Modeling Spaceships using Blender 3D

Hybrid View

Previous Post Previous Post   Next Post Next Post
  1. #1
    Guild Adept bryguy's Avatar
    Join Date
    Jul 2008
    Location
    In my own little world =D
    Posts
    289

    Tutorial

    Part 3: Using the Discombobulator/Finding Scripts :


    This will hopefully be the easiest thing to learn. First though, you will need to learn how to get into scripts in blender. I will start with that.


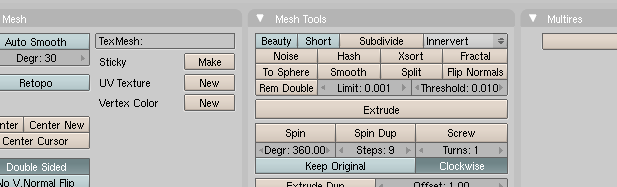
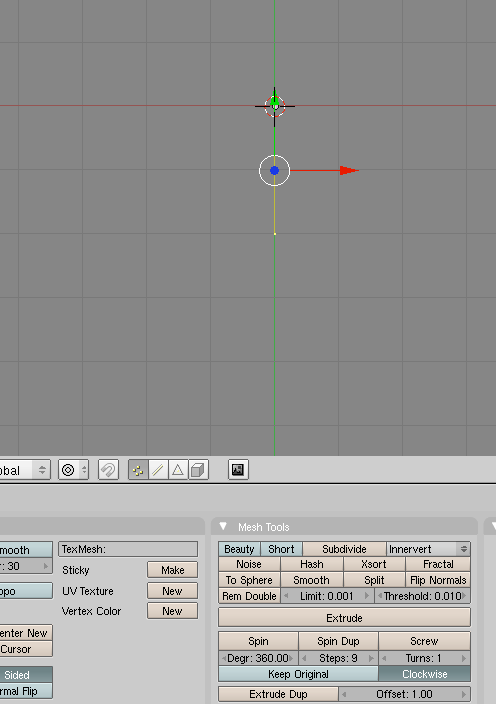
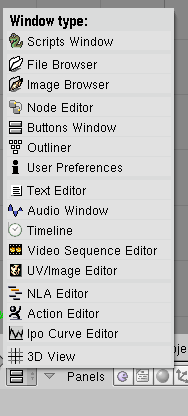
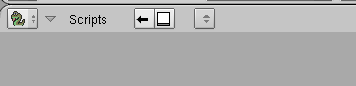
    1) See that little box in the corner of the button screen? Click it. A window should now pop up that is titled at the top, Window Type. Change the type to Script.


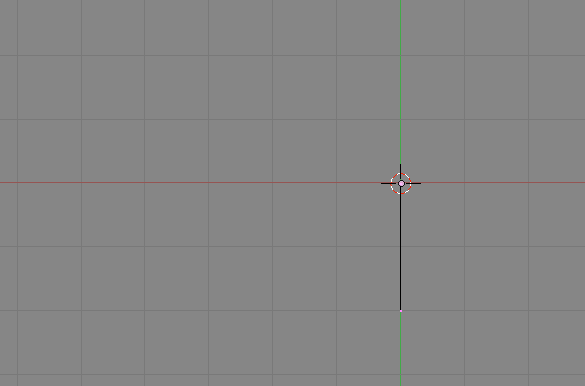
    If your buttons screen turned out looking like that last picture, then congratz

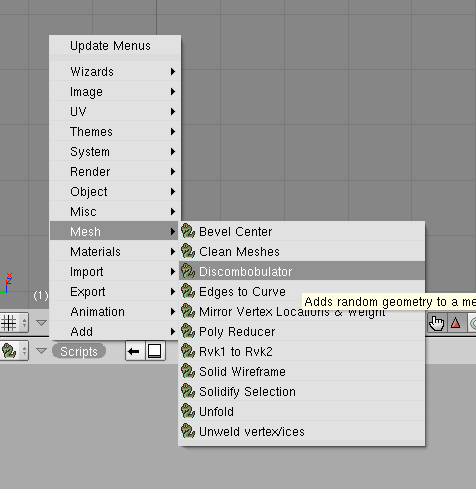
    2) Now to get to the Discombobulator. See the word there that says Scipts?? Click that, and a dropdown menu (or just a menu) should appear. On it, go Mesh--> Discombobulator. The Discombobulator menu should now appear.


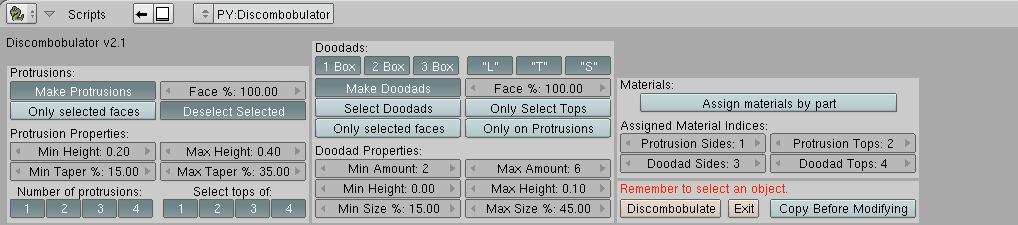
    Looks confusing doesnt it? Well, its not really that confusing. Im going to tell you the basics about using it, but if you want, there is a website with a mini tutorial for the Discombobulator, and I suggest you look at that to learn the basics of what is what and what does what. Here is the link:
    http://www.nccn.net/~w_rosky/evan/ev.../tutorial.html

    If you dont read all of it, you wont understand a word of what Im going to say.

    How to get the best looking Greebles:

    1) You may be asking now "What the *@#! is a greeble???", or "What is he talking gibberish for?". Im going to explain. A Greeble is the name given to the cool little protrusions that are on things like spaceships, imperial star destroyers, the like, that you are going to create using the Discombobulator. Occasionally, Greebles are called something like Nurnies, but I prefer the name Greebles.

    2) Now here is how to get the best result using the Discombobulator.

    Face: Unless you want your model completely and totally engulfed in Greebles and Doodads (the protrusions that are usually on top of greebles. You should know what they are if you read the tutorial link i gave you), then I suggest you set the face percentage to 80% or less. Stuff like wings I prefer to have the face percentage set to 90%.

    Min/Max Height: These are tricky. You might be thinking "Oh, Ill just skip this and put in a Min height of -4 (for an inward greeble) and max height of 25 for some tall towers". Bad idea. The max/min height is set up so that 4 is about the same as 400, and 25 about the same as 2500. You will most likely want to use decimals for these. I suggest using nothing nothing less than -0.20 and nothing more than +0.20.

    Min/Max Taper: These you can set to whatever you like. 0 Taper is basically a cube, and 100 taper is a pyramid. I like to set the Min to 0 and the Max to 100, that way I get a pretty good range of taper.

    Number of Protrusions/Select Tops of: I dont really have any clue what these do, but I just keep them all selected.

    Also, I suggest that you keep the Make Protrusions box checked (or chosen), and the Only Selected Faces and Deselect Selected unchecked (or unchosen).

    For Doodads:

    I suggest having a Min ammount of 0 and a max ammount of 6, but the rest are I suggest you having like just below the ammount of the same type you have for the protrusions. So if you have like a Face % of 80%, then for doodads make it at least 75%. Also, keep play around with which boxes you want chosen, but I like to keep the 1-3 box boxes checked, along with the L S and T ones checked, and Make Doodads, only selected tops, and only on protrusions checked. The rest I leave unchecked.

    The rest you can leave, or experiment with. Also, be sure to uncheck the Copy before Modifying box unchecked, as that messes it up and you would have to go back and do it all again. Also, be sure to have your mode in Object Mode and to have an object selected.


    When your done, hit the Discombobulate button, and after a short wait, you should have your Greebles. Heres what your spaceship should look like:


    It may take some experimenting to get the hang of it, but after a while you may be able to use the discombobulator with your eyes closed


    Be sure to keep experimenting, and if you accidentally do something wrong while using the discombobulator, then just hit Cntrl+Z to undo it.


    Hope you enjoyed


    Bryguy.

    Note: I may at a later time put more blender tutorials here, but for now, enjoy
    "When I use a word," Humpty Dumpty said in a rather scornful tone," it means just what I choose it to mean -- neither more nor less."
    "The question is," said Alice, "whether you can make words mean so many things."

    "The question is," said Humpty Dumpty, "which is to be master -- that's all."


    -Lewis Carrol: Through the Looking Glass

  2. #2
    Administrator Redrobes's Avatar
    Join Date
    Dec 2007
    Location
    England
    Posts
    7,201
    Blog Entries
    8

    Post

    I tried the decom script on my ship but I found it difficult to use. It seems to treat each face as an individual entity instead of as a whole surface. Consequently it seems to put massive spikes on the really small polygons.

    Anyway, what I did try is the polygon reduce script which is really cool. This is my model head at 40,000, 4000, and 1000 polys. It did a really good job of reducing them with good resulting mesh. Very impressed.

    I have a request for a tutorial tho. What I would like to do is create an empty mesh which I have done easily as its a straight forward option. Then I have added vertexes to it with ctrl+LMB in the shape of half a section of a wine glass. Now to stitch those vertexes into a planar mesh I had some trouble but I found the easiest way was to select them 3 or 4 at a time and use the F button. Is there any way of selecting them all in one go and skinning them into a single poly or a filled mesh of triangles. Anyway, got that far. Now I want to 'spin' or lathe this into my wineglass. The spin tool is beyond me. All I get from it is a mess. I have the 3D cursor on the bottom left vertex as shown and then I go to Num7 for top view. Press A for select all in edit mode and then spin with 360, 90, 1. Result - rubbush. What am I doing wrong ?

    Image shows front view but I am trying to spin from top view.
    Last edited by Redrobes; 10-30-2008 at 06:37 PM.

  3. #3
    Guild Adept bryguy's Avatar
    Join Date
    Jul 2008
    Location
    In my own little world =D
    Posts
    289

    Post

    @--> RR


    Hmm.... Im having a little trouble trying to understand what your trying to do... from the sounds of it, your trying to model a wine glass, but using an object, then adding additional vertices to it, and then modeling it into a wine glass.... but thats as much as i understand of what you said


    oh well. For your discombobulator problem tho, it sounds like your maximum doodad or protrusions height is to heigh, and maybe the minimum height is to low. If it is, your thing is probably looking like my first picture attatchment, which is a monkey discombobulated wrong. You want it to look more like my second attachment, which is what the monkey looks like done right.

    Also, something I forgot to mention for using the discombobulator. The percentage things (max height, min heigh, etc) are sliders, so dont just hit the arrows, click and hold on them, and then move your mouse left and/or right to make the amount go up and down in the decimals.


    First Attachment has max height 1
    Second Attachment has max height 0.12

    (p.s. Ill try and work on your problem)
    Attached Thumbnails Attached Thumbnails Click image for larger version. 

Name:	bad monkey.png 
Views:	1584 
Size:	47.3 KB 
ID:	7437   Click image for larger version. 

Name:	good monkey.png 
Views:	1509 
Size:	74.1 KB 
ID:	7438  
    "When I use a word," Humpty Dumpty said in a rather scornful tone," it means just what I choose it to mean -- neither more nor less."
    "The question is," said Alice, "whether you can make words mean so many things."

    "The question is," said Humpty Dumpty, "which is to be master -- that's all."


    -Lewis Carrol: Through the Looking Glass

  4. #4
    Administrator Redrobes's Avatar
    Join Date
    Dec 2007
    Location
    England
    Posts
    7,201
    Blog Entries
    8

    Post

    Thanks Bryguy. I did try a variety of values but I think the issue is that I have big and small polys mixed in the model.

    Here are some screenies of light wave doing the goblet. Took me just a few secs to do this and I know I am very familiar with it but it just seems so much easier to get things done in LW. Still - I must persevere...

    What I want is to spin the profile of the goblet into a 3D version. LW has very similar spin tool called lathe with the same values of 360 & 90 but you specify the 3D cursor equiv coord numerically or by placing the marker down like blender and also you specify the axis by the last clicked in window where blender does it on the current view window - i.e. its all very similar.

    So pic 1 - same as blender
    Pic2 - numeric lathe settings - similar to blender
    Pic3 - Instant goblet - not like what I get out of blender at all.

    So what am I doing wrong. Lathe / Spin is such a common thing to do that I cant live without it. Its like not having extrude or something equally as basic.

  5. #5
    Guild Adept bryguy's Avatar
    Join Date
    Jul 2008
    Location
    In my own little world =D
    Posts
    289

    Post

    hmm... are you doing this all in edit mode or object mode?


    also, i cant seem to find the spin tool, where exactly is it?

    and for the result you get in blender, does it look sort-of like a goblet (cup, whatever) just without the curves?


    could you post a picture of what it ends out looking like?

    edit: also, do you think you could send me the .blend file? that way i could experiment with it to try and figure out a way to get it into a goblet (cup, whatever )
    Last edited by bryguy; 10-31-2008 at 02:18 PM.
    "When I use a word," Humpty Dumpty said in a rather scornful tone," it means just what I choose it to mean -- neither more nor less."
    "The question is," said Alice, "whether you can make words mean so many things."

    "The question is," said Humpty Dumpty, "which is to be master -- that's all."


    -Lewis Carrol: Through the Looking Glass

  6. #6
    Administrator Redrobes's Avatar
    Join Date
    Dec 2007
    Location
    England
    Posts
    7,201
    Blog Entries
    8

    Post

    I have been fighting it all night and I have something gobletty shaped now but still wrong. Blender is doing my head in. It always always always gives you what you don't want. Heres another two examples. I have spun the goblet and its highlighting the original edge that I used to spin it with. Ok no problem so I delete that and remove double verticees. Then I look at the normals. They are wrong. It seems as though the original faces from the spin are still in there. So theres no option of spinning without doing endcaps to the spin. So now I guess I am supposed to go in and hand pick out all the tiny faces and delete them ??? Even if I do this then the normals are still wrong. Theres a tut I found on doing a goblet just like I was doing here.
    http://www.blender3dclub.com/index.p...article&sid=45

    If you look at the image with the aqua lines then why are the normals on the rim pointing down ? Thats what I get too.

    So I do a recalc normals which get them right even though it created the damn faces and should have calculated them right all by itself. They are wrong around the seam because I cant be assed to go in there and delete all the bitty edge ones so lets focus on the goblet where its now correct.

    In the tut he puts on a sub surface which is a bit overkill. So I went to mesh, edge, subdivide smooth. It subdivides it but not smooth. The angles for the cup are all faceted. I tried again with the object set as 'smooth' and its still the same. I mean how bad can this UI get ?

    Here is light wave goblet and then subdivided smooth and blender subdivde smooth.

    I'm getting real frustrated with blender to the point where I am probably going to use it just as a renderer and consign it to the garbage for modeling cos its riddled with bugs or stupid stuff that could easily be fixed if only they could be bothered.

    Sorry for derailing your thread. Ill discombobulate my goblet right now...

  7. #7
    Guild Adept bryguy's Avatar
    Join Date
    Jul 2008
    Location
    In my own little world =D
    Posts
    289

    Tutorial

    aha! I have discovered de secret of de spinner!!


    Using the Spinner in Blender:


    The spin tool, if used correctly, is actually very simple. Hopefully this will allow you to use it effectively.


    1) Open Blender, and delete the square, or open your image if you want.

    2) This is the MOST IMPORTANT PART. If you get this wrong, or any part about it, it will mess up your image. First, something you need to know. Have you ever noticed that little target like thing? The one that if you just click with your LMB on the 3D screen, it moves to about where you click? THAT is the all important secret to the spinner. So before you create your object that your going to spin, be sure to do this.


    1} Use the 2 and 8 buttons to change your view so that your look straight down. Now click somewhere, about the center of where your object is going to spin. Its okay if its slightly off. I like to line it up with the red and green lines, or about.


    2} Now change your view to a side view. If you dont have your object that your going to spin, then create one. The object your going to spin has to be COMPLETELY AND TOTALLY FLAT. It works best if you make your object out of a bunch of planes. For now, if you dont have an object, rotate your view to the side (so that the grid just looks like a flat line) and then hit the spacebar and choose Add--> Mesh--> Plane.


    This is how your thing should be looking, with the target thingy about in the center of your plane, no matter what view your in.

    3} Now use your arrows to get it complete lined up with the little target thing, rotating your view to the top if needed.


    3) Now once its all lined up, with the side thats in the center also lined up with the other 2 lines, with the plane still selected, change your mode Edit Mode


    4) In edit mode, hit Cntrl+Tab and choose Vertices. Now hit the AKey to deselect all vertices, then hit it again to select all of them.


    5) Now to use the spin tool. Take your view back to an overhead view if your not, and then under the spin tool, set Degr to 360, and then click the [b]Spin button[b/].


    Walla! You should now have it spun all the way around! If it ends up with gaps between segments, then your object was not a plane to begin with, and it wont work right. If you want (I actually have no clue what this does) hit the Akey to deselct all, then hit it again to select the entire thing again, and hit the Rem Double button.


    Here are some pictures of my outcome:

    "When I use a word," Humpty Dumpty said in a rather scornful tone," it means just what I choose it to mean -- neither more nor less."
    "The question is," said Alice, "whether you can make words mean so many things."

    "The question is," said Humpty Dumpty, "which is to be master -- that's all."


    -Lewis Carrol: Through the Looking Glass

Posting Permissions

  • You may not post new threads
  • You may not post replies
  • You may not post attachments
  • You may not edit your posts
  •